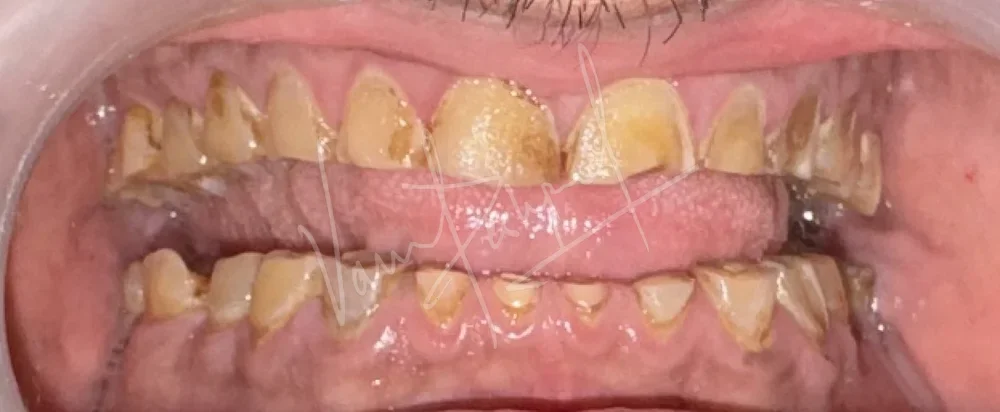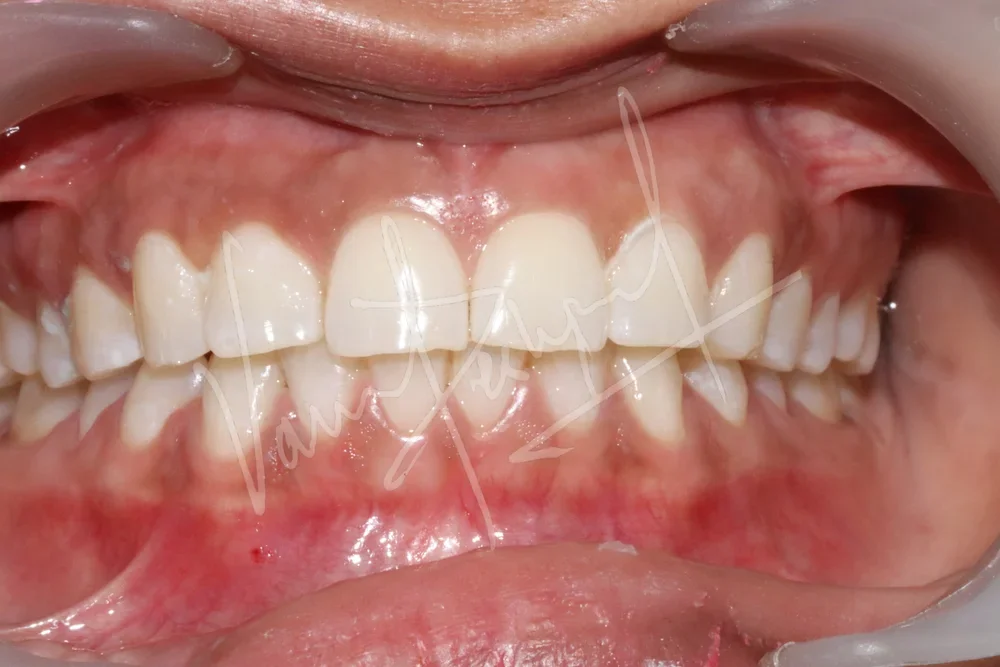
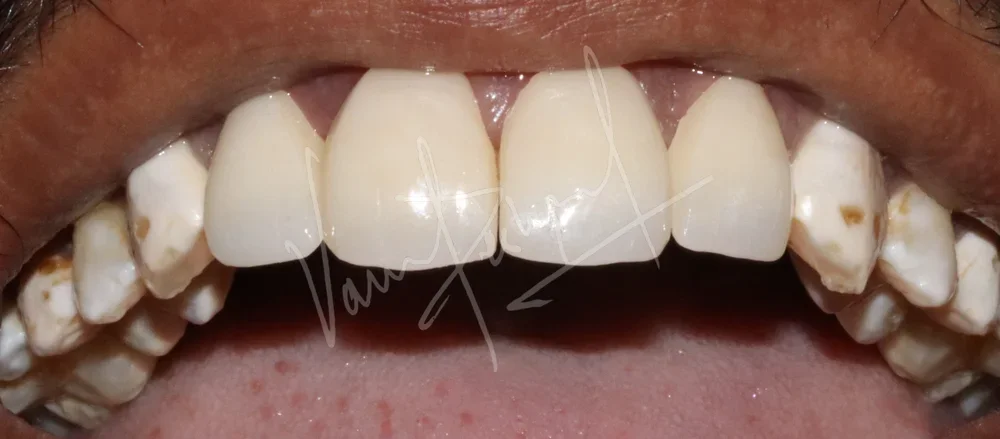
Media Gallery

Civil Chowk clinic, photo 1
Civil Chowk clinic, photo 2
Civil Chowk clinic, photo 3
Civil Chowk clinic, photo 4
Civil Chowk clinic, photo 5
Civil Chowk clinic, photo 6
Civil Chowk clinic, photo 7
Civil Chowk clinic, photo 8
Civil Chowk clinic, photo 9
Civil Chowk clinic, photo 10
Civil Chowk clinic, photo 11
Civil Chowk clinic, photo 12
Civil Chowk clinic, photo 13
Civil Chowk clinic, photo 14
Sirat Nagar Branch
Antrolikar Nagar clinic, photo 1
Antrolikar Nagar clinic, photo 2
Antrolikar Nagar clinic, photo 3
Antrolikar Nagar clinic, photo 4
Antrolikar Nagar clinic, photo 5
Antrolikar Nagar clinic, photo 6
Antrolikar Nagar clinic, photo 7
Antrolikar Nagar clinic, photo 8
Antrolikar Nagar clinic, photo 9
Jule Solapur clinic, photo 1
Jule Solapur clinic, photo 2
Jule Solapur clinic, photo 3
Jule Solapur clinic, photo 4
Jule Solapur clinic, photo 5
Jule Solapur clinic, photo 6
Jule Solapur clinic, photo 7
Jule Solapur clinic, photo 8
Jule Solapur clinic, photo 9
Jule Solapur clinic, photo 10
Jule Solapur clinic, photo 11
Jule Solapur clinic, photo 12
Jule Solapur clinic, photo 13
Jule Solapur clinic, photo 14
Jule Solapur clinic, photo 15
Jule Solapur clinic, photo 16
Jule Solapur clinic, photo 17
Jule Solapur clinic, photo 18
Jule Solapur clinic, photo 19
Jule Solapur clinic, photo 20
Jule Solapur clinic, photo 21
Jule Solapur clinic, photo 22
Jule Solapur clinic, photo 23
Jule Solapur clinic, photo 24
Jule Solapur clinic, photo 25
Jule Solapur clinic, photo 26
Jule Solapur clinic, photo 27
Jule Solapur clinic, photo 28
Jule Solapur clinic, photo 29
Jule Solapur clinic, photo 30
Jule Solapur clinic, photo 31
Jule Solapur clinic, photo 32
Jule Solapur clinic, photo 33
Jule Solapur clinic, photo 34
Jule Solapur clinic, photo 35
Jule Solapur clinic, photo 36
Jule Solapur clinic, photo 37
Jule Solapur clinic, photo 38
Jule Solapur clinic, photo 39
Jule Solapur clinic, photo 40
Jule Solapur clinic, photo 41
Jule Solapur clinic, photo 42
Jule Solapur clinic, photo 43
Jule Solapur clinic, photo 44
Jule Solapur clinic, photo 45
Jule Solapur clinic, photo 46
Jule Solapur clinic, photo 47
Jule Solapur clinic, photo 48
Jule Solapur clinic, photo 49
Jule Solapur clinic, photo 50
Jule Solapur clinic, photo 51
Jule Solapur clinic, photo 52
Jule Solapur clinic, photo 53
Jule Solapur clinic, photo 54
Jule Solapur clinic, photo 55
Jule Solapur clinic, photo 56
Jule Solapur clinic, photo 57
Jule Solapur clinic, photo 58
CBCT Scanner Machine with Doctors
Machines 2
CBCT Scanner Machine
CBCT Scanner Machine with Patient
Philips Zoom WhiteSpeed
Digital Shade Selection Machine
Intraoral Scanner Machine
Our Expert MDS Dentists Dr. Varun Deshpande and Dr. Rucha Deshpande
Dr. Varun Deshpande (Prosthodontist & Implantologist)
Dr. Rucha Deshpande (Endodontist)
Deshpande Dental team, photo 1
Deshpande Dental team, photo 2
Deshpande Dental team, photo 3
Deshpande Dental team, photo 4
Deshpande Dental team, photo 5
Deshpande Dental team, photo 6
Deshpande Dental team, photo 7
X-ray Image 1
X-ray Image 2
X-ray Image 3
X-ray Image 4
X-ray Image 5
4 Unit Laminate Veneers - Image 1
4 Unit Laminate Veneers - Image 2
4 Unit Laminate Veneers - Image 3
4 Unit Laminate Veneers - Image 4
4 Unit Laminate Veneers - Image 5
Full Mouth Rehabilitation with Metal Ceramic Prosthesis - Image 1
Full Mouth Rehabilitation with Metal Ceramic Prosthesis - Image 2
Full Mouth Rehabilitation with Metal Ceramic Prosthesis - Image 3
Anterior 2 unit All Ceramic Prosthesis - Image 1
Anterior 2 unit All Ceramic Prosthesis - Image 2
Anterior 3 Unit Zirconia - Image 1
Anterior Zirconia Bridge - Image 1
Anterior Zirconia Bridge - Image 2
Anterior Zirconia Bridge - Image 3
Anterior Zirconia Bridge - Image 4
Anterior Zirconia Bridge - Image 5
Anterior Zirconia Prosthesis - Image 1
Anterior Zirconia Prosthesis - Image 2
Anterior Zirconia Prosthesis - Image 3
Anterior Zirconia Prosthesis - Image 4
Sensitive contentClick to reveal
Anterior Zirconia Prosthesis - Image 5
Anterior Zirconia Prosthesis - Image 6
Anterior Zirconia Prosthesis - Image 7
Flapless Guided Implant Surgery - Image 1
Flapless Guided Implant Surgery - Image 2
Flapless Guided Implant Surgery - Image 3
Flapless Guided Implant Surgery - Image 4
Flapless Guided Implant Surgery - Image 5
Flapless Guided Implant Surgery - Image 6
Flapless Guided Implant Surgery - Image 7
Full Mouth Rehabilitation using All Ceramic Prosthesis - Image 1
Full Mouth Rehabilitation using All Ceramic Prosthesis - Image 2
Full Mouth Rehabilitation using All Ceramic Prosthesis - Image 3
Full Mouth Rehabilitation using Crown and Bridge and Precision Attachment - Image 1
Full Mouth Rehabilitation using Crown and Bridge and Precision Attachment - Image 2
Full Mouth Rehabilitation using Crown and Bridge and Precision Attachment - Image 3
Full Mouth Rehabilitation using Metal Ceramic Prosthesis - Image 1
Full Mouth Rehabilitation using Metal Ceramic Prosthesis - Image 2
Full Mouth Rehabilitation using Metal Ceramic Prosthesis - Image 3
Full Mouth Rehabilitation using Metal Ceramic Prosthesis - Image 4
Full Mouth Rehabilitation using Metal Ceramic Prosthesis - Image 5
Full Mouth Rehabilitation using Precision Attachment with Crown and Bridge and Dental Implants - Image 1
Full Mouth Rehabilitation using Zirconia Prosthesis - Image 1
Full Mouth Rehabilitation using Zirconia Prosthesis - Image 10
Full Mouth Rehabilitation using Zirconia Prosthesis - Image 11
Full Mouth Rehabilitation using Zirconia Prosthesis - Image 12
Full Mouth Rehabilitation using Zirconia Prosthesis - Image 13
Full Mouth Rehabilitation using Zirconia Prosthesis - Image 14
Full Mouth Rehabilitation using Zirconia Prosthesis - Image 15
Full Mouth Rehabilitation using Zirconia Prosthesis - Image 16
Full Mouth Rehabilitation using Zirconia Prosthesis - Image 2
Full Mouth Rehabilitation using Zirconia Prosthesis - Image 3
Full Mouth Rehabilitation using Zirconia Prosthesis - Image 4
Full Mouth Rehabilitation using Zirconia Prosthesis - Image 5
Full Mouth Rehabilitation using Zirconia Prosthesis - Image 6
Full Mouth Rehabilitation using Zirconia Prosthesis - Image 7
Full Mouth Rehabilitation using Zirconia Prosthesis - Image 8
Full Mouth Rehabilitation using Zirconia Prosthesis - Image 9
Full Mouth Rehabilitation with Porcelain-Fused-to-Metal Prosthesis - Image 1
Full Mouth Rehabilitation with Porcelain-Fused-to-Metal Prosthesis - Image 2
Full Mouth Rehabilitation with Porcelain-Fused-to-Metal Prosthesis - Image 3
Full Mouth Rehabilitation with Porcelain-Fused-to-Metal Prosthesis - Image 4
Full Mouth Rehabilitation with Porcelain-Fused-to-Metal Prosthesis - Image 5
Full Mouth Rehabilitation with Porcelain-Fused-to-Metal Prosthesis - Image 6
Full Mouth Rehabilitation with Porcelain-Fused-to-Metal Prosthesis - Image 7
Full Mouth Rehabilitation with Porcelain-Fused-to-Metal Prosthesis - Image 8
Full Mouth Rehabilitation with Porcelain-Fused-to-Metal Prosthesis - Image 1
Full Mouth Rehabilitation with Porcelain-Fused-to-Metal Prosthesis - Image 2
Full Mouth Rehabilitation with Porcelain-Fused-to-Metal Prosthesis - Image 1
Full Mouth Rehabilitation with Porcelain-Fused-to-Metal Prosthesis - Image 2
Full Mouth Rehabilitation with Porcelain-Fused-to-Metal Prosthesis - Image 3
Full Mouth Rehabilitation using All Ceramic Prosthesis - Image 1
Full Mouth Rehabilitation using All Ceramic Prosthesis - Image 2
Full Mouth Rehabilitation using Dental Implants and Crown and Bridge - Image 1
Full Mouth Rehabilitation using Dental Implants and Crown and Bridge - Image 10
Full Mouth Rehabilitation using Dental Implants and Crown and Bridge - Image 11
Full Mouth Rehabilitation using Dental Implants and Crown and Bridge - Image 12
Full Mouth Rehabilitation using Dental Implants and Crown and Bridge - Image 13
Full Mouth Rehabilitation using Dental Implants and Crown and Bridge - Image 14
Full Mouth Rehabilitation using Dental Implants and Crown and Bridge - Image 2
Full Mouth Rehabilitation using Dental Implants and Crown and Bridge - Image 3
Full Mouth Rehabilitation using Dental Implants and Crown and Bridge - Image 4
Full Mouth Rehabilitation using Dental Implants and Crown and Bridge - Image 5
Full Mouth Rehabilitation using Dental Implants and Crown and Bridge - Image 6
Full Mouth Rehabilitation using Dental Implants and Crown and Bridge - Image 7
Full Mouth Rehabilitation using Dental Implants and Crown and Bridge - Image 8
Full Mouth Rehabilitation using Dental Implants and Crown and Bridge - Image 9
Full Mouth Rehabilitation using Metal Ceramic Prosthesis - Image 1
Full Mouth Rehabilitation using Metal Ceramic Prosthesis - Image 2
Full Mouth Rehabilitation using Metal Ceramic Prosthesis - Image 3
Full Mouth Rehabilitation using Metal Ceramic Prosthesis - Image 1
Full Mouth Rehabilitation using Metal Ceramic Prosthesis - Image 2
Full Mouth Rehabilitation using Metal Ceramic Prosthesis - Image 3
Full Mouth Rehabilitation using Metal Ceramic Prosthesis - Image 4
Full Mouth Rehabilitation using Metal Ceramic Prosthesis - Image 5
Full Mouth Rehabilitation using Metal Ceramic Prosthesis - Image 6
Full Mouth Rehabilitation using Zirconia Monolithic Prosthesis - Image 1
Full Mouth Rehabilitation using Zirconia Monolithic Prosthesis - Image 10
Full Mouth Rehabilitation using Zirconia Monolithic Prosthesis - Image 11
Full Mouth Rehabilitation using Zirconia Monolithic Prosthesis - Image 12
Full Mouth Rehabilitation using Zirconia Monolithic Prosthesis - Image 13
Full Mouth Rehabilitation using Zirconia Monolithic Prosthesis - Image 14
Full Mouth Rehabilitation using Zirconia Monolithic Prosthesis - Image 15
Full Mouth Rehabilitation using Zirconia Monolithic Prosthesis - Image 2
Full Mouth Rehabilitation using Zirconia Monolithic Prosthesis - Image 3
Full Mouth Rehabilitation using Zirconia Monolithic Prosthesis - Image 4
Full Mouth Rehabilitation using Zirconia Monolithic Prosthesis - Image 5
Full Mouth Rehabilitation using Zirconia Monolithic Prosthesis - Image 6
Full Mouth Rehabilitation using Zirconia Monolithic Prosthesis - Image 7
Full Mouth Rehabilitation using Zirconia Monolithic Prosthesis - Image 8
Full Mouth Rehabilitation using Zirconia Monolithic Prosthesis - Image 9
Full Mouth Rehabilitation using Zirconia Prosthesis - Image 1
Full Mouth Rehabilitation using Zirconia Prosthesis - Image 10
Full Mouth Rehabilitation using Zirconia Prosthesis - Image 11
Full Mouth Rehabilitation using Zirconia Prosthesis - Image 12
Full Mouth Rehabilitation using Zirconia Prosthesis - Image 13
Full Mouth Rehabilitation using Zirconia Prosthesis - Image 14
Full Mouth Rehabilitation using Zirconia Prosthesis - Image 15
Full Mouth Rehabilitation using Zirconia Prosthesis - Image 16
Full Mouth Rehabilitation using Zirconia Prosthesis - Image 17
Full Mouth Rehabilitation using Zirconia Prosthesis - Image 2
Full Mouth Rehabilitation using Zirconia Prosthesis - Image 3
Full Mouth Rehabilitation using Zirconia Prosthesis - Image 4
Full Mouth Rehabilitation using Zirconia Prosthesis - Image 5
Full Mouth Rehabilitation using Zirconia Prosthesis - Image 6
Full Mouth Rehabilitation using Zirconia Prosthesis - Image 7
Full Mouth Rehabilitation using Zirconia Prosthesis - Image 8
Full Mouth Rehabilitation using Zirconia Prosthesis - Image 9
Full Mouth Rehabilitation with Metal Ceramic Prosthesis - Image 1
Full Mouth Rehabilitation with Metal Ceramic Prosthesis - Image 10
Full Mouth Rehabilitation with Metal Ceramic Prosthesis - Image 11
Full Mouth Rehabilitation with Metal Ceramic Prosthesis - Image 2
Full Mouth Rehabilitation with Metal Ceramic Prosthesis - Image 3
Full Mouth Rehabilitation with Metal Ceramic Prosthesis - Image 4
Full Mouth Rehabilitation with Metal Ceramic Prosthesis - Image 5
Full Mouth Rehabilitation with Metal Ceramic Prosthesis - Image 6
Full Mouth Rehabilitation with Metal Ceramic Prosthesis - Image 7
Full Mouth Rehabilitation with Metal Ceramic Prosthesis - Image 8
Full Mouth Rehabilitation with Metal Ceramic Prosthesis - Image 9
Full Mouth Rehabilitation with Metal Ceramic Prosthesis - Image 1
Full Mouth Rehabilitation with Metal Ceramic Prosthesis - Image 2
Full Mouth Rehabilitation with Metal Ceramic Restoration and Dental Implants - Image 1
Full Mouth Rehabilitation with Metal Ceramic Restoration and Dental Implants - Image 2
Full Mouth Rehabilitation with Metal Ceramic Restoration and Dental Implants - Image 3
Full Mouth Rehabilitation with Metal Ceramic Restoration and Dental Implants - Image 4
Full Mouth Rehabilitation with Metal Ceramic Restoration and Dental Implants - Image 5
Lower Arch Reconstruction with Zirconia Prosthesis - Image 1
Lower Arch Reconstruction with Zirconia Prosthesis - Image 10
Lower Arch Reconstruction with Zirconia Prosthesis - Image 2
Lower Arch Reconstruction with Zirconia Prosthesis - Image 3
Lower Arch Reconstruction with Zirconia Prosthesis - Image 4
Lower Arch Reconstruction with Zirconia Prosthesis - Image 5
Lower Arch Reconstruction with Zirconia Prosthesis - Image 6
Lower Arch Reconstruction with Zirconia Prosthesis - Image 7
Lower Arch Reconstruction with Zirconia Prosthesis - Image 8
Lower Arch Reconstruction with Zirconia Prosthesis - Image 9
Mandibular Fixed Prosthesis using Dental Implants - Image 1
Mandibular Fixed Prosthesis using Dental Implants - Image 2
Mandibular Fixed Prosthesis using Dental Implants - Image 3
Mandibular Fixed Prosthesis using Dental Implants - Image 4
Mandibular Fixed Prosthesis using Dental Implants - Image 1
Mandibular Fixed Prosthesis using Dental Implants - Image 2
Mandibular Fixed Prosthesis using Dental Implants - Image 3
Mandibular Fixed Prosthesis using Dental Implants - Image 4
Mandibular Implant supported Fixed Prosthesis - Image 1
Maxillary and Mandibular All on 4 Implant Supported Prosthesis - Image 1
Maxillary and Mandibular All on 4 Implant Supported Prosthesis - Image 2
Maxillary and Mandibular All on 4 Implant Supported Prosthesis - Image 3
Maxillary and Mandibular All on 4 Implant Supported Prosthesis - Image 4
Maxillary and Mandibular All on 4 Implant Supported Prosthesis - Image 5
Maxillary and Mandibular All on 4 Implant Supported Prosthesis - Image 6
Maxillary and Mandibular All on 4 Implant Supported Prosthesis - Image 7
Maxillary and Mandibular All on 4 Implant Supported Prosthesis - Image 8
Maxillary and Mandibular Implant supported Fixed Prosthesis - Image 1
Maxillary and Mandibular Implant supported Fixed Prosthesis - Image 2
Maxillary and Mandibular Implant supported Fixed Prosthesis - Image 3
Maxillary and Mandibular Implant supported Fixed Prosthesis - Image 4
Maxillary and Mandibular Implant supported Fixed Prosthesis - Image 5
Maxillary and Mandibular Implant supported Fixed Prosthesis - Image 6
Maxillary and Mandibular Implant supported Fixed Prosthesis - Image 7
Maxillary and Mandibular Implant supported Fixed Prosthesis - Image 8
Maxillary and Mandibular Implant supported Fixed Prosthesis - Image 9
Maxillary Complete Denture and Mandibular Implant supported Fixed Prosthesis - Image 1
Maxillary Complete Denture and Mandibular Implant supported Fixed Prosthesis - Image 2
Maxillary Complete Denture and Mandibular Implant supported Fixed Prosthesis - Image 3
Maxillary Complete Denture and Mandibular Implant supported Fixed Prosthesis - Image 4
Maxillary Complete Denture and Mandibular Implant supported Fixed Prosthesis - Image 5
Midline Diastema Closure using Laminate Veneers - Image 1
One Year Follow up of Full Mouth Rehabilitation case with Metal Ceramic Prosthesis - Image 1
One Year Follow up of Full Mouth Rehabilitation case with Metal Ceramic Prosthesis - Image 2
One Year Follow up of Full Mouth Rehabilitation case with Metal Ceramic Prosthesis - Image 3
Prosthetic Rehabilitation of Maxillary defect using Obturator and Precision Attachment - Image 1
Prosthetic Rehabilitation of Maxillary defect using Obturator and Precision Attachment - Image 10
Prosthetic Rehabilitation of Maxillary defect using Obturator and Precision Attachment - Image 11
Prosthetic Rehabilitation of Maxillary defect using Obturator and Precision Attachment - Image 12
Prosthetic Rehabilitation of Maxillary defect using Obturator and Precision Attachment - Image 13
Prosthetic Rehabilitation of Maxillary defect using Obturator and Precision Attachment - Image 14
Prosthetic Rehabilitation of Maxillary defect using Obturator and Precision Attachment - Image 15
Prosthetic Rehabilitation of Maxillary defect using Obturator and Precision Attachment - Image 16
Prosthetic Rehabilitation of Maxillary defect using Obturator and Precision Attachment - Image 17
Prosthetic Rehabilitation of Maxillary defect using Obturator and Precision Attachment - Image 18
Prosthetic Rehabilitation of Maxillary defect using Obturator and Precision Attachment - Image 2
Prosthetic Rehabilitation of Maxillary defect using Obturator and Precision Attachment - Image 3
Prosthetic Rehabilitation of Maxillary defect using Obturator and Precision Attachment - Image 4
Prosthetic Rehabilitation of Maxillary defect using Obturator and Precision Attachment - Image 5
Prosthetic Rehabilitation of Maxillary defect using Obturator and Precision Attachment - Image 6
Prosthetic Rehabilitation of Maxillary defect using Obturator and Precision Attachment - Image 7
Prosthetic Rehabilitation of Maxillary defect using Obturator and Precision Attachment - Image 8
Prosthetic Rehabilitation of Maxillary defect using Obturator and Precision Attachment - Image 9
Replacing Anterior Single Tooth with Dental Implant - Image 1
Replacing Anterior Single Tooth with Dental Implant - Image 2
Replacing Anterior Single Tooth with Dental Implant - Image 3
Replacing Anterior Single Tooth with Dental Implant - Image 4
Replacing Anterior Single Tooth with Dental Implant - Image 5
Restoring Anterior Fractured Teeth with All Ceramic Prosthesis - Image 1
Restoring Anterior Fractured Teeth with All Ceramic Prosthesis - Image 2
Restoring Anterior Fractured Teeth with All Ceramic Prosthesis - Image 3
Restoring Anterior Fractured Teeth with All Ceramic Prosthesis - Image 4
Dental Implants - Image 1
Dental Implants - Image 2
Dental Implants - Image 3
Dental Implants - Image 4
Dental Implants - Image 5
Dental Implants - Image 6
Dental Implants - Image 7
Sensitive contentClick to reveal
Dental Implants - Image 8
Sensitive contentClick to reveal
Dental Implants - Image 9
Sensitive contentClick to reveal
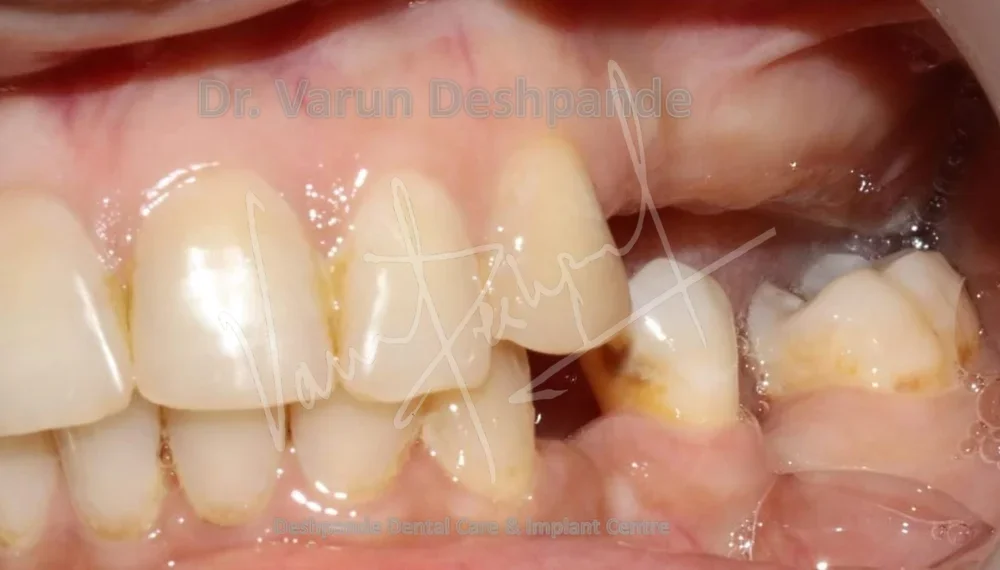
Dental Implants - Image 10
Sensitive contentClick to reveal
Dental Implants - Image 11
Sensitive contentClick to reveal
Dental Implants - Image 12
Dental Implants - Image 13
Dental Implants - Image 14
Dental Implants - Image 15
Dental Implants - Image 16
Dental Implants - Image 17
Dental Implants - Image 18
Sensitive contentClick to reveal
Dental Implants - Image 19
Sensitive contentClick to reveal
Dental Implants - Image 20
Sensitive contentClick to reveal
Dental Implants - Image 21
Sensitive contentClick to reveal
Dental Implants - Image 22
Sensitive contentClick to reveal
Dental Implants - Image 23
Sensitive contentClick to reveal
Dental Implants - Image 24
Dental Implants - Image 25
Dental Implants - Image 26
Dental Implants - Image 27
Dental Implants - Image 28
Dental Implants - Image 29
Dental Implants - Image 30
Dental Implants - Image 31
Dental Implants - Image 32
Dental Implants - Image 33
Dental Implants - Image 34
Dental Implants - Image 35
Dental Implants - Image 36
Dental Implants - Image 37
Dental Implants - Image 38
Dental Implants - Image 39
Dental Implants - Image 40
Dental Implants - Image 41
Smiles - Image 1
Smiles - Image 2
Smiles - Image 3
Smiles - Image 4
Smiles - Image 5
Smiles - Image 6
Smiles - Image 7
Zoom Teeth Whitening - Image 1
Zoom Teeth Whitening - Image 10
Zoom Teeth Whitening - Image 11
Zoom Teeth Whitening - Image 12
Zoom Teeth Whitening - Image 13
Zoom Teeth Whitening - Image 14
Zoom Teeth Whitening - Image 15
Zoom Teeth Whitening - Image 16
Zoom Teeth Whitening - Image 2
Zoom Teeth Whitening - Image 3
Zoom Teeth Whitening - Image 4
Zoom Teeth Whitening - Image 5
Zoom Teeth Whitening - Image 6
Zoom Teeth Whitening - Image 7
Zoom Teeth Whitening - Image 8
Zoom Teeth Whitening - Image 9
Journal publication 1
Journal publication 2
Journal publication 3
Journal publication 4
Journal publication 5
Journal publication 6

Combined across the three clinic listings · Checked 10 Oct 2026 · Updated manually.